
Are you looking for the perfect glueless wig? Nadula no slip glueless drawstring wig is your best choice. Nadula 2026 glueless strap wig is made of 100% human hair, and it won't slip or lift at the edges, and it can be styled in various styles.
In this article, YouTube influencer Mercy Gono provides a detailed review of this product, along with styling and installation tips. She highly recommends this no slip, no lace lifting, glueless wig. Whether you're a wig novice or an experienced beauty enthusiast, the Nadula 2026 glueless drawstring wig will completely change your perception of wigs. Please read on!
What Is a Glueless Drawstring Wig?
Glueless drawstring wigs are a type of wig that doesn't require glue, tape, or adhesives for attachment. Instead, they are secured using built-in combs, adjustable straps, and a drawstring system. Traditional lace front wigs require glue or adhesive to blend the hairline naturally. Drawstring wigs eliminate this step, making them ideal for beginners and everyday wearers who want a natural look without using adhesive products.
Mercy Gono Real Reviews Of Nadula Glueless Drawstring Yaki Straight Wig
This Wig is Absolutely Gorgeous
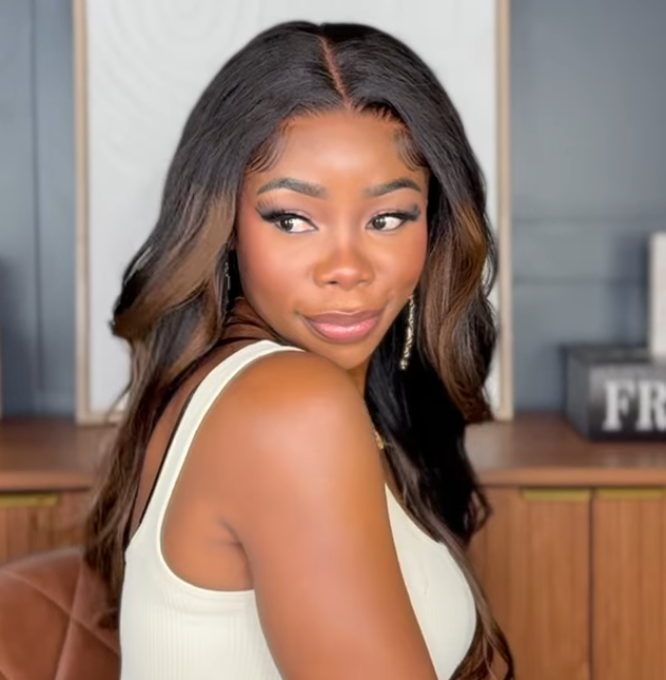
I love this wig so much! It's especially perfect for those who want a little bit of personality, a little bit of color, but don't want to completely change their hairstyle. This wig is made for you. This wig is from Nadula. It's very lightweight, but also very voluminous. This wig is truly beautiful.
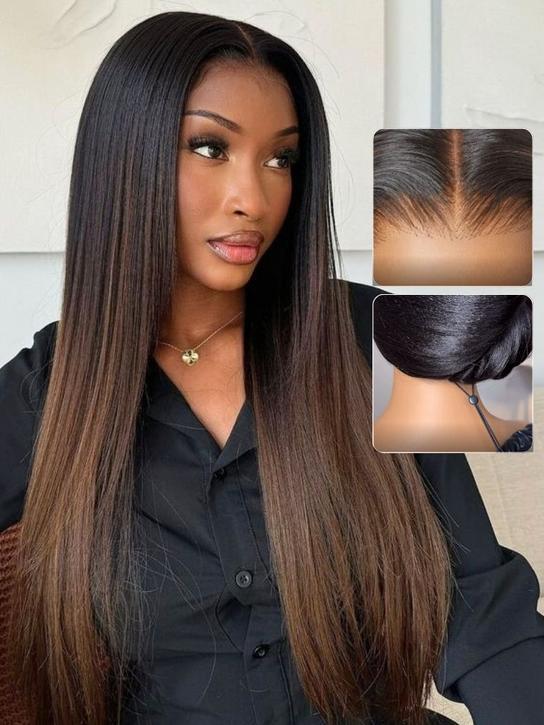
Yaki Texture
This hairstyle is a Yaki straight style. It mimics the texture of your natural hair after blow-drying or straightening with a flat iron. And this wig is completely glueless. You can wear this wig as a completely glueless wig.
Thick and Lightweight Hair
The hair on this wig is very thick, but it doesn't look like a wig. It's not heavy at all. It's very lightweight. It feels very natural and comfortable to wear, perfect for all-day wear.
Pre-plucked Hairline
This wig already has a pre-plucked hairline, so you don't need to do any plucking or mess with your lace.
Pre-Cut Lace and Pre-Styled
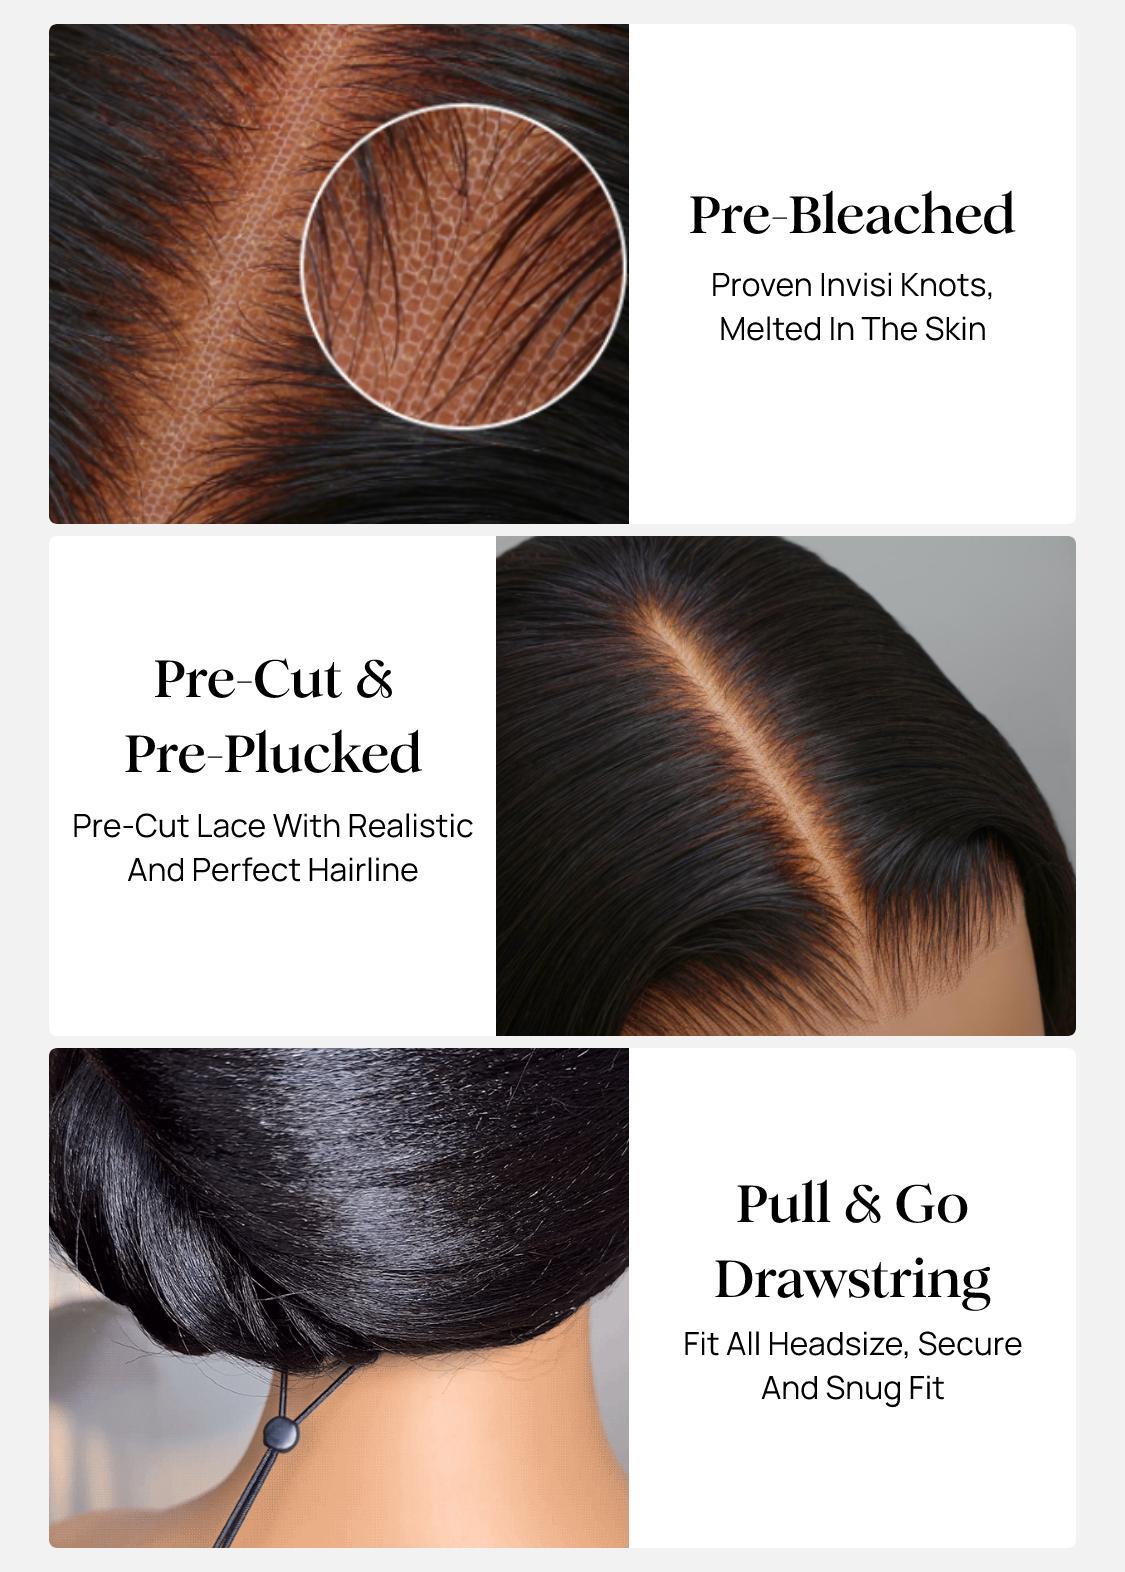
It's already trimmed and styled for you. It comes with a middle part, but you can also do a side part or any part you want.
Pre-bleached Knots
It's also pre-bleached knots, so the knots are almost invisible. For those who are new to wearing wigs, or those who already wear wigs but don't know how to style them. You can literally take it out of the box, put it on and go.
Drawstring Design
This wig comes with a thin headband and a drawstring, so you can tighten or loosen the hair, freely adjusting it to fit all head sizes.
Multiple Styling Options
You can tie it into a ponytail, like a high ponytail from the back. You can also do a half-up, half-down hairstyle.
Secure and No Slip
The wig's securing mechanism is a large comb that you can attach to your hair. When you use these to secure your hair at the back, no matter how much you shake your head, the wig won't fall off; it's very secure.
How To Style a Glueless Drawstring Yaki Straight Wig?
I'm going to show you some techniques and teach you how to truly create your own style. Now, let's put on the wig and start styling!
Step 1: Perfectly Blend Hair Color With Skin Tone
Although the wig has already been bleached and dyed, everyone's skin tone is different. We all have different complexions. So, I think the best way is to use your foundation, because that's the color that best matches your skin tone.
Dip some foundation onto a brush and evenly apply it to the wig cap to match the wig cap color to my skin tone. You only need to do this once.
Note: Don't put too much foundation on the brush, because the foundation will seep into the hair strands, and then you'll have a big clump of foundation on your wig. You only need to apply a little bit of foundation and then gently brush it.
Step 2: Putting On the Wig
Put the wig on your head, secure the clips on both sides of the wig, then tighten the drawstring at the back of your head to the size that fits your head circumference, and tuck the excess strap back into your hair.
Step 3: Creating Natural Hairline
Create some small wisps of hair at the front hairline, letting the wisps fall naturally. Then wrap a scarf around your head. After a while, remove the scarf, and you'll get a natural hairline.
Step 4: Creating a Straight Hairstyle
Use a straightener to straighten the hair, straightening most of the curls to get a comfortable straight hairstyle.
Step 5: Creating a Wavy Hairstyle
Curl the hair with a curling iron, and then comb through the curls to make them look more wavy. This wig curls beautifully.