
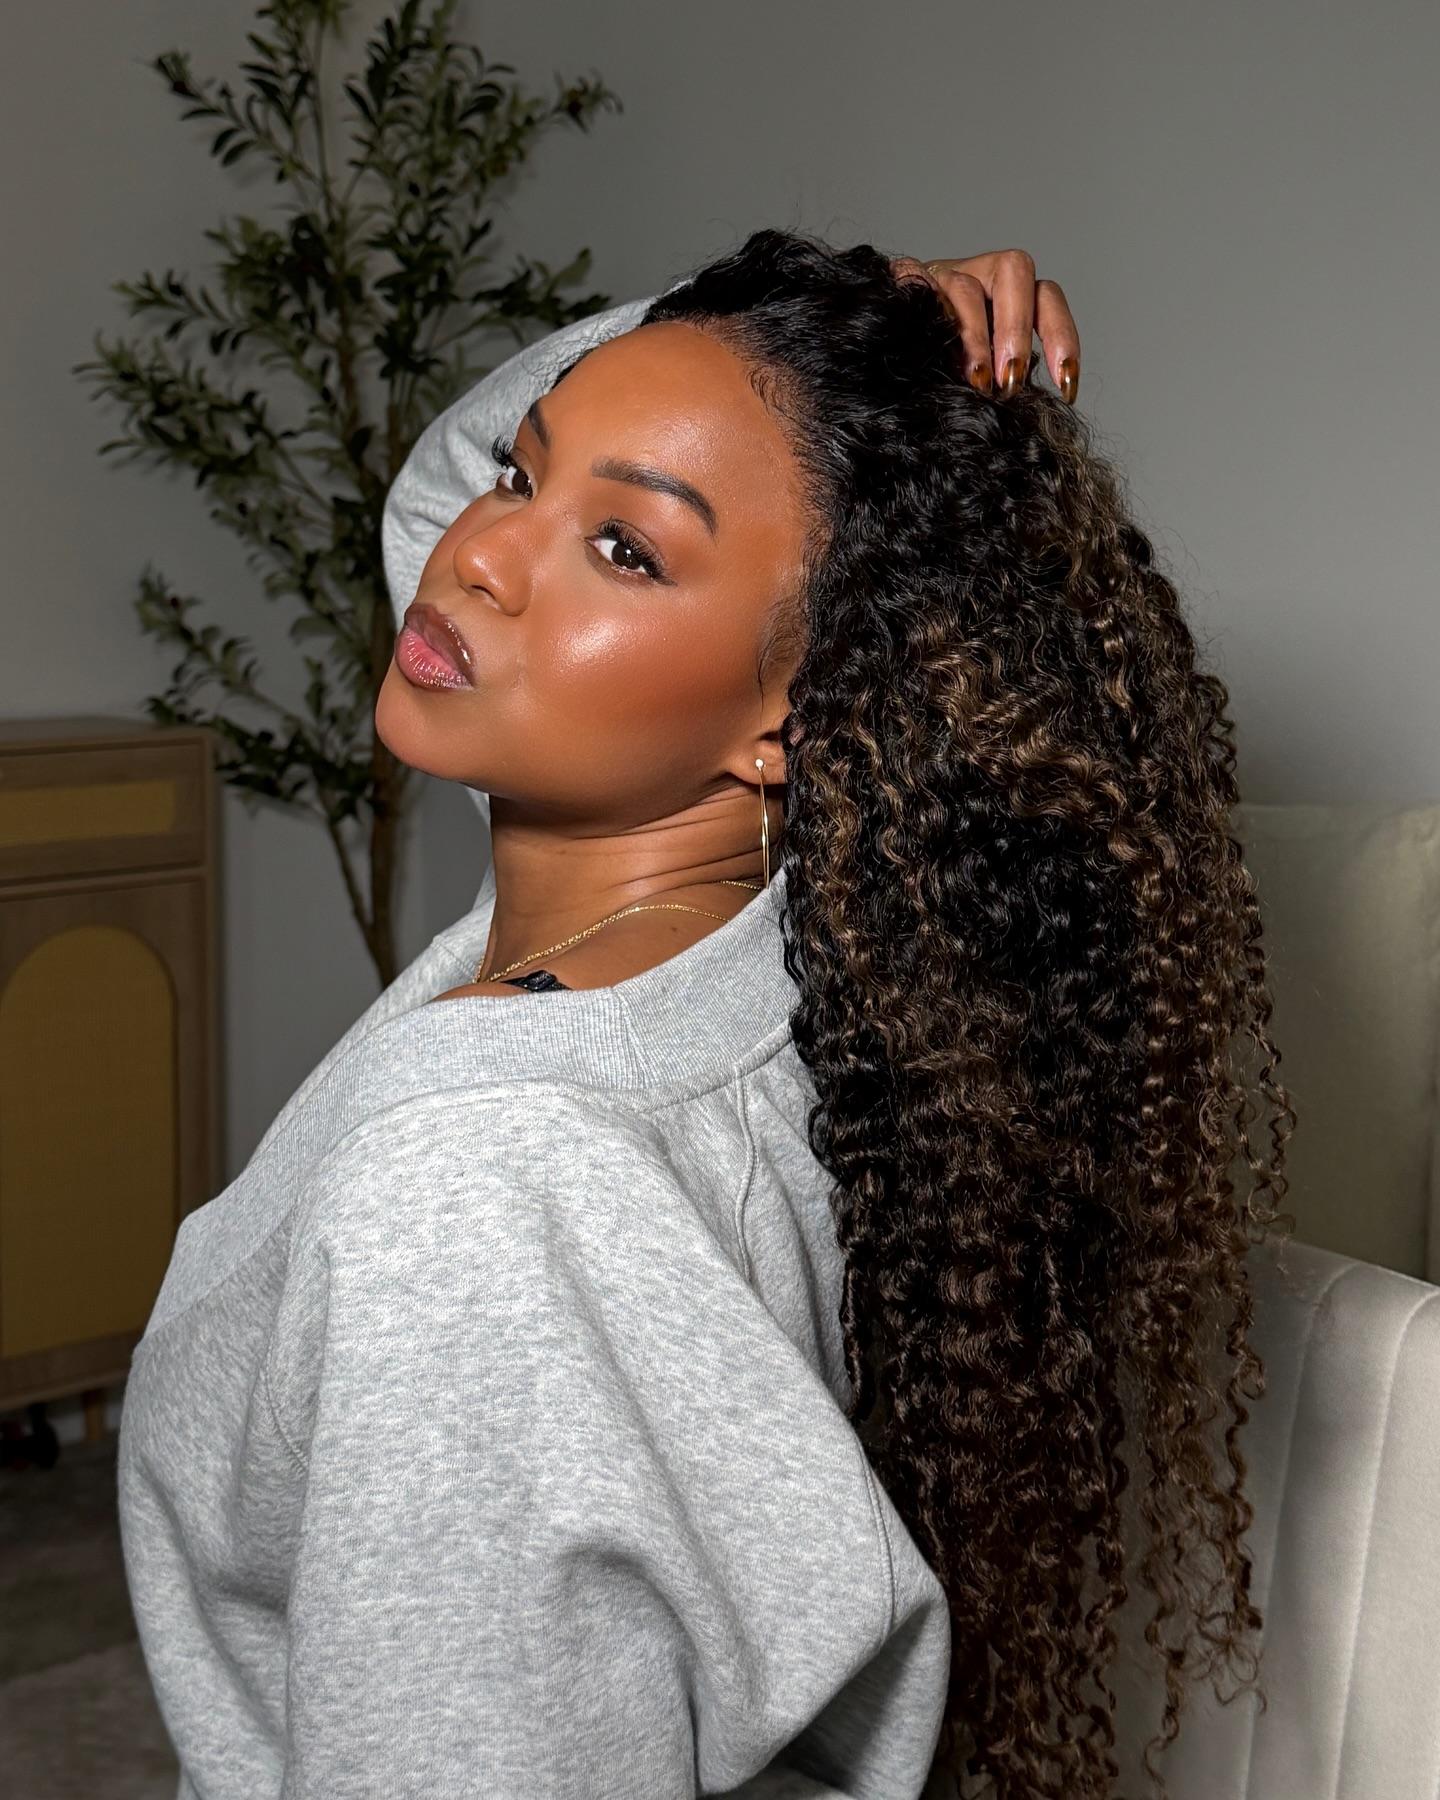
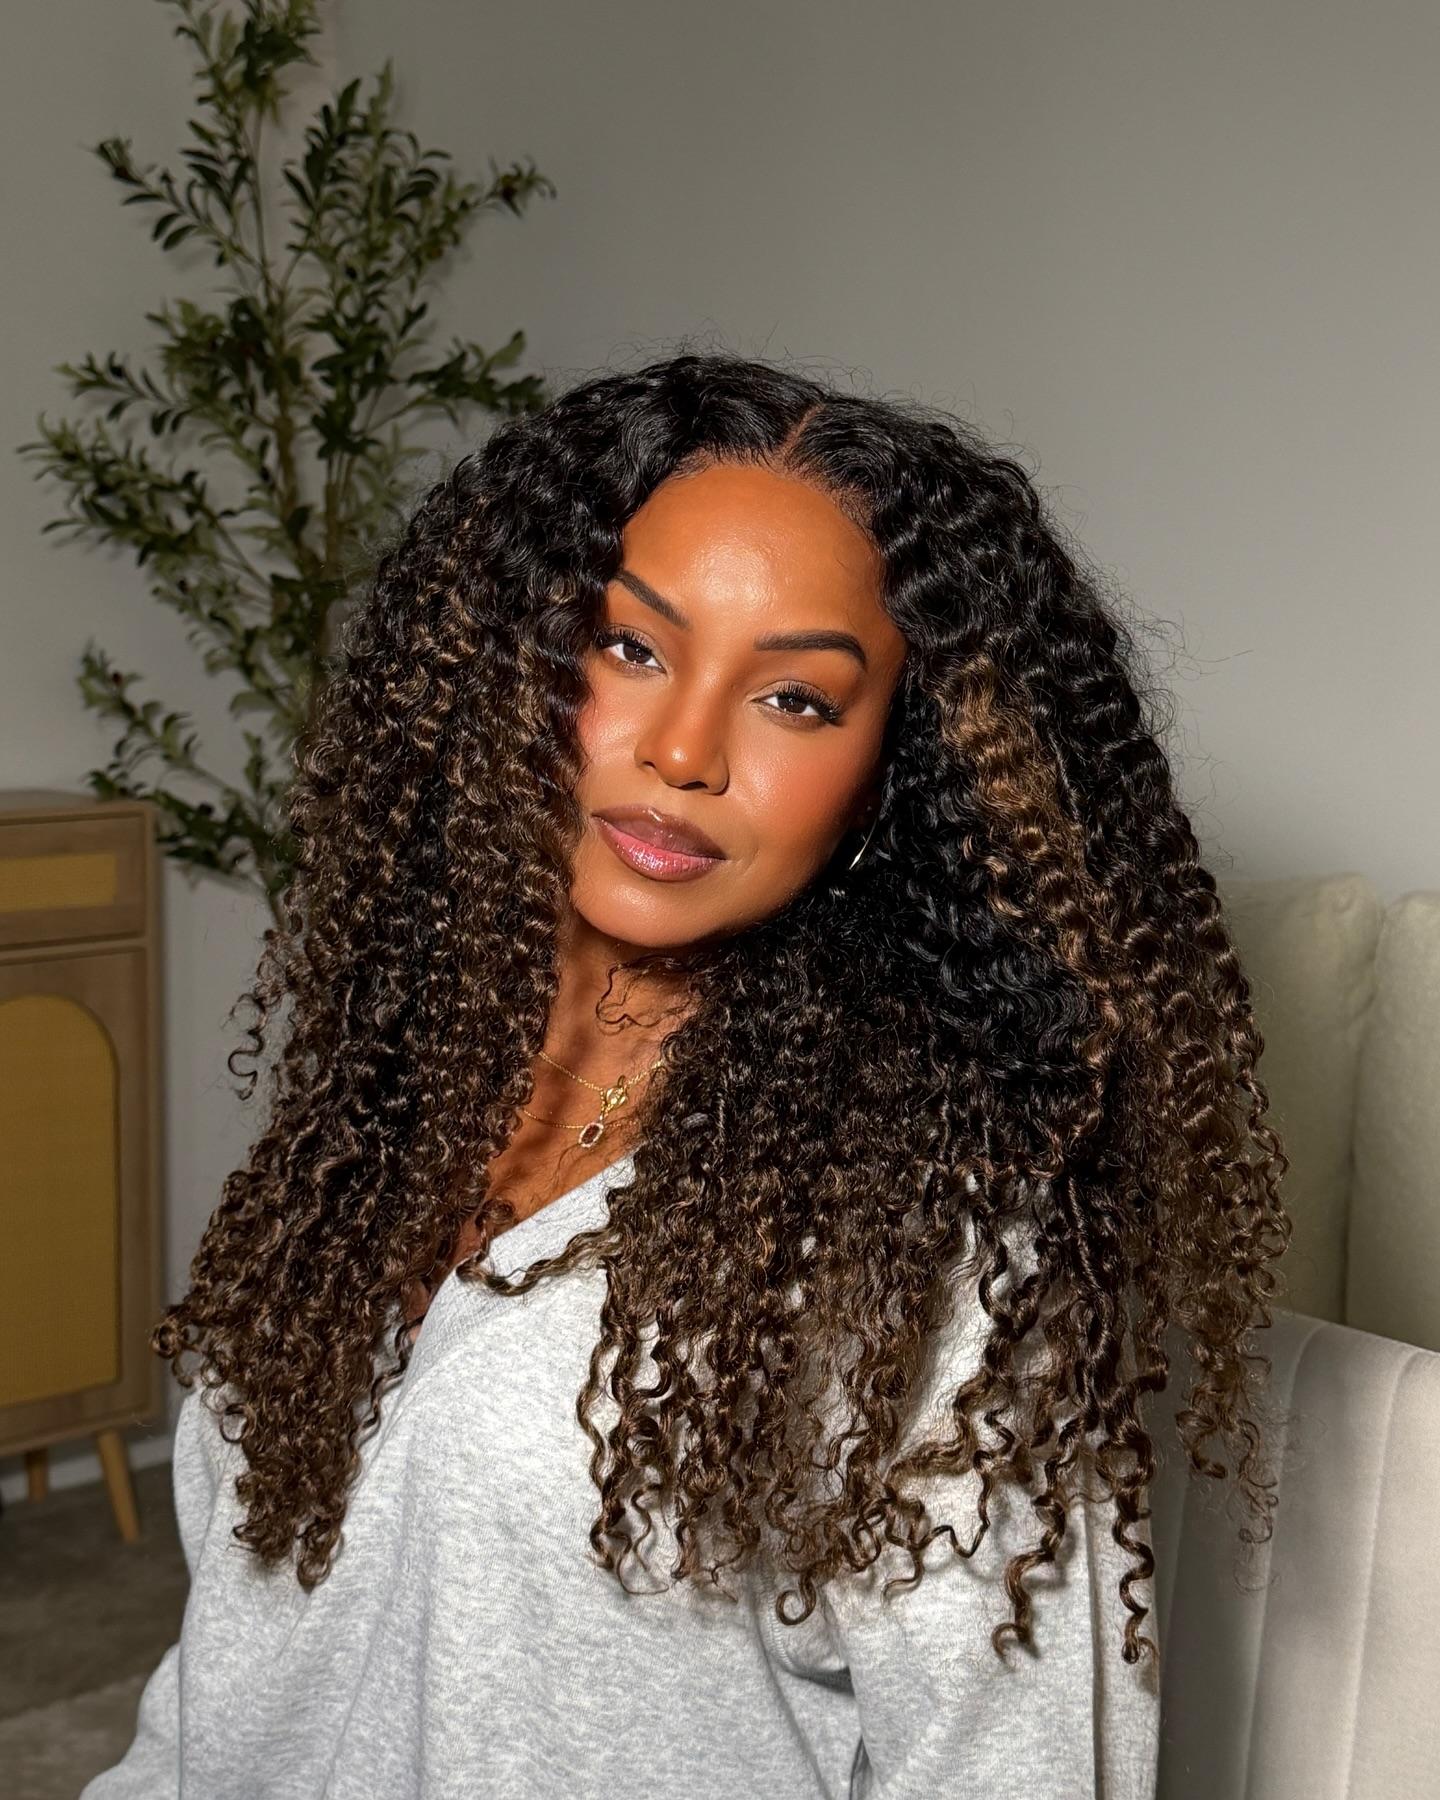
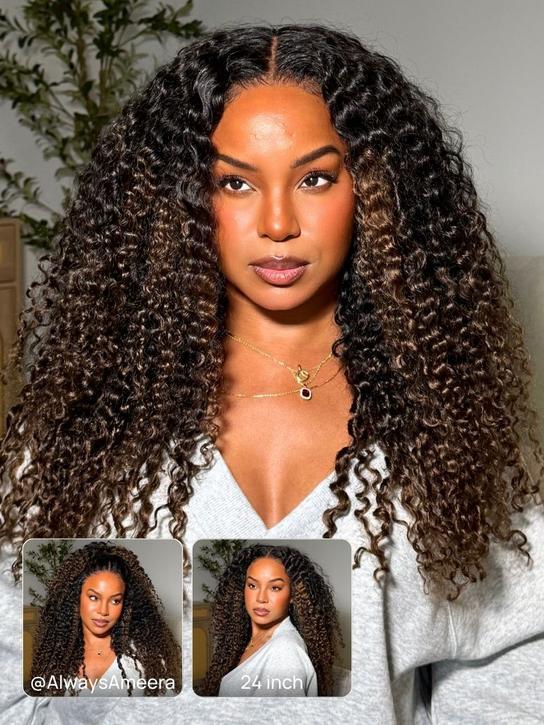
This new curly glueless wig looks too natural for beginners. This wig is a chestnut brown ombre Burmese curly wig. The Burmese curly texture has naturally voluminous, ranging from deep waves to tighter curls, similar to 3C curl type. It's very natural and flawless in a flash.
Do you want to try this curly bye bye knots wig? In this article, the Youtube influencer AlwaysAmeera features a glueless curly wig application and the honest review. Let’s learn techniques for melting the lace and styling the curls.
The Reviews Of Burmese Curly Glueless Wig From AlwaysAmeera
I want to thank Nadula Hair for providing this glueless bleaced knots curly wig. I absolutely love this wig! I can't get enough of it. Besides the wig, you also receive some free gifts, an elastic band, a wig cap, etc. This curly wig stays securely on my forehead. It's warmer than anything else in this cold winter. This is a glueless wig without ear tabs.
This wig is a 24-inch 7x5 ombre chestnut brown curly wig with finger coils at the ends. This wig comes with a piano key-style elastic band. It also has an elastic drawstring with silicone strips on the back. It also comes with several combs. But most importantly, it's super easy to wear and very secure.
One thing I love about this wig is its ombre chestnut brown color. When I took it out of the box, I thought, "Wow, the color is exactly as they described." It's such a beautiful color. The wig has a pre-plucked hairline, and the lace is pre-cut, requiring no trimming. I love this curly wig; it's so beautiful.
How To Install The Glueless Curly Wig Natural?
Step 1: Trimming the Hairline
I'm planning to create some baby hairs, so I really wanted to trim the hairline again. This wig actually doesn't need any trimming, but I just like to do it. So, we trimmed the hairline.
Step 2: Dyeing the Lace
The lace tint I'm using gives a perfect color, and the color is buildable. So, if you want a deeper color, you can apply more tint, which is perfect for occasions like going on vacation. This makes the lace completely invisible. This lace is very natural and blends well. So, depending on your skin tone, you might not need lace tint, it's up to you.
Step 3: Flattening the Hairline and Securing the Wig
I'll use a heated comb to flatten the hairline. Then we can secure the wig. I tightened the drawstring at the back and tucked it in. This completely secures the wig.
Step 4: Blending the Lace Edges
My usual method is to spray the melting spray onto tweezers and then apply the spray to the lace with the tweezers, instead of spraying it directly onto the lace. To prevent the lace glue from running onto my face, I use the tail of a comb to apply it, and this works great.
Step 5: Removing Small Lace Edges
When wearing a wig, there are small curled lace edges that I need to remove with a razor. Remember to be very careful when using a razor and avoid cutting your skin.
Step 6: Styling the Baby Hairs
My method for styling baby hairs is very simple. I like shorter baby hairs, and this time I'm going to cut them even shorter. I'll curl them first with a curling iron, and then use Got2b Glued styling stick to hold them in place. Because when styling baby hairs, if the hair hasn't been curled, it's difficult to hold them in place, especially after I've finished styling the hairline. So, I found that curling them with a small curling iron makes the baby hairs easier to style and hold in place.
Step 7: Plucking Natural Hairline
I don't like too many baby hairs. I think it affects the look of the wig. I'll pluck some of the baby hairs to make them shorter. Now all the steps are complete, and the hairline looks fantastic. It looks beautiful, natural, and perfectly blended.
Step 8: Creating a Faux Sideburn
To make the wig look more natural, we need to create a faux sideburn. I'll pull out some natural-looking wisps of hair to make it look more realistic. From the side, you can't tell at all that I'm wearing a wig.
Step 9: Making the Curls More Defined
First, I'll divide my hair into two sections and clip them up. Then I'll apply an anti-frizz curl-defining mousse to my hair and use a comb to style the curls, separating the strands. Then I'll trim any split ends. While styling, I can use my fingers to twist the curls to give them more shine.
Step 10: Drying the Hair
After the hairline is set, I'll blow-dry my hair. Let the curls dry completely. Then apply some hair serum. This helps the hair maintain its curl, prevents frizz, and keeps the curls defined. If you prefer a slightly frizzier look, you can fluff up the hair. Simply pull at the roots to let the ends naturally become more voluminous. This will make the hair look even more beautiful.
The Customers' Reviews Of The Curly Glueless Wig
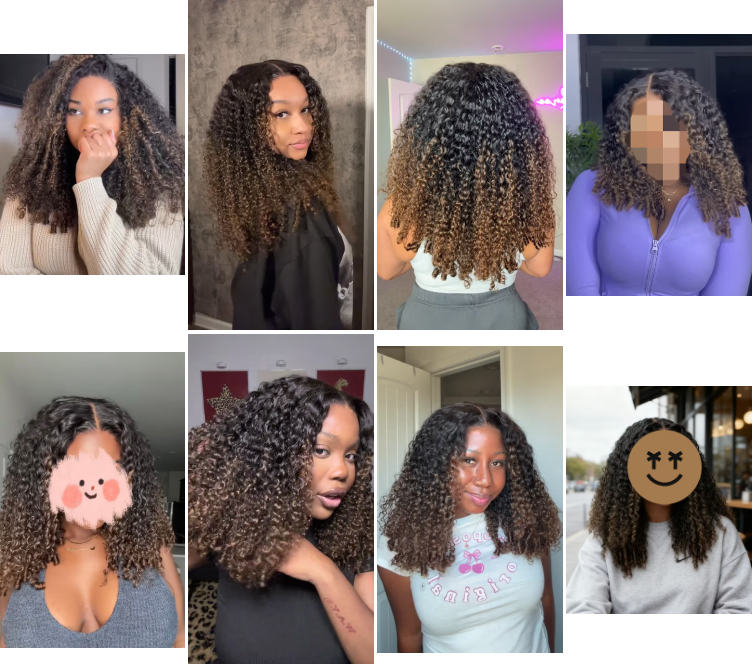
The hair was soft and beautiful!! The length and density was perfect, no smell but i always wash before use, the curl pattern bounced back. The lace laid and was slayed!!! Will buy again!!!! -@N*****
This is the softest hair I've ever touched or even owned in a front lace wig with these gorgeous curls. I thought my order arrived fairly fast & I'm super happy. Fast Shipping. -@n*****
This hair is perfect. No shedding and fits perfectly on my large head. The drawstring keeps it in place and it also is adjustable with the band. I looked on YouTube to find the perfect way to style so that it looks natural and was able to execute this wig perfectly. Nadula is now my only supplier for wigs. They are the best. -@B*****
The Details Of The Products
Hair Info: 24'' 7*5 Byebyeknots Ombre Chestnut Brown Curly With Finger Coil Ends Wig