
This glueless wig install tutorial features a new red curly wig from Nadula Hair. In this article, you can learn application techniques, including lace tinting and styling tips for beginners. Explore various styling options, from a half-updo to a chic bun, to maximize the wig's versatility. Also, we can learn the honest full reviews of the reddish brown glueless curly wig from AlwaysAmeera.
Can this wig really put on and go? How well does it actually perform? I'm really curious to see what improvements the "2.0" version offers. I want to see what updates Nadula has included in the system. So, next, we're going to test this wig. I'll show you what the wig looks like right out of the box. So, if you want to see how I put on this wig and what adjustments I made to make it look this way, please keep reading.
Nadula Hair Reddish Brown Glueless Curly Wig Unboxing Review
This wig on my head is the Bye-Bye Knots wig 2.0. Nadula gave it a system update. It is a 7x5 invisible knots reddish brown curly put on and go wig. When you pop the hood on this wig, you can see that this wig comes with a piano key elastic band. It also comes with an elastic drawstring in the back for the girls who have a tiny head. I love the elastic drawstring.
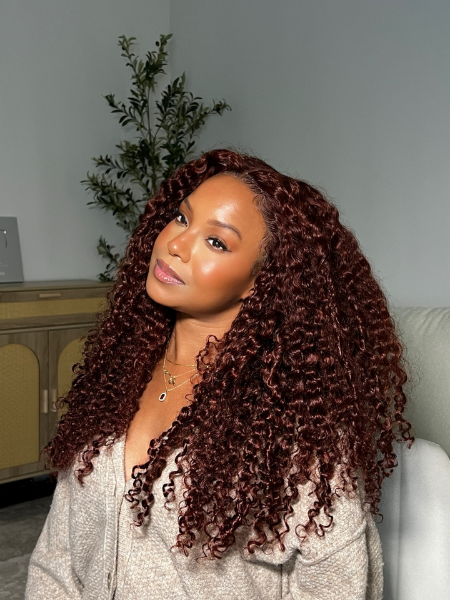
When I first pulled this wig out of the box, the first thing I noticed was the hair color. The hair color is stunning. This is a gorgeous hair color. It's like a cartoon with the red curly hair. Miss Frizle.
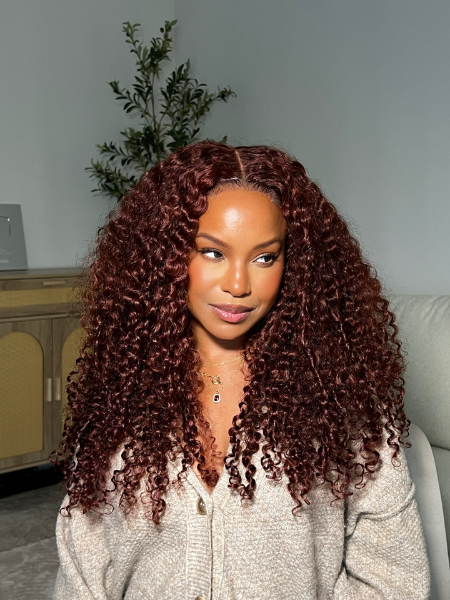
This wig is so beautiful. It looks very natural. It stays securely on my head. It's very secure, and it looks absolutely gorgeous. The hairline is perfect.
How To Install Nadula Reddish Brown Glueless Curly Wig?
Step 1: Create a Base For This Wig
We'll start with the base. We'll keep the base part simple. This is a wig securing band. We'll put it on. The wig securing band prevents the wig from slipping and keeps it in place. Then we wear the wig on my head. It is a a reddish brown cherry batty wig.
Step 2: Tint The Lace
The lace needs to blend better with my skin tone. The lace on this wig looks a little light against my skin. So it needs to be dyed. My favorite lace dye is The More Crazy 3-in-1 Lace Dye. This is medium brown. Let's take the wig off first, because we want to wear this wig glueless, so your lace has to match your skin tone.
I'm going to take some mousse first and apply it to the lace, then I'm going to use my brush to spread the mousse all over the lace. Then I'll brush it out and blend it in. Let it air dry, because if you blow-dry it, it will make the hair frizzy. Air drying takes about 30 minutes, or you can use a hairdryer, which takes about five minutes.
Step 3: Flatten The Hairline
After dyeing the lace, I need to properly style the roots. I'm going to use the Carare styling wax stick to smooth this area. We'll apply some wax to it, then use the back of a comb to press it down. We'll also use a heated comb to flatten the roots. For the hairline, I'll reattach the wig to the wig band and then comb the roots with the comb's teeth to make the hairline look smoother.
Step 4: Pluck The Hairline
I'm going to use my tweezers to gently pluck some hairs along the hairline. We'll pluck some hairs from areas where the hair is naturally thinner. Then we'll also pluck a few hairs behind the hairline. Plucking some hairs along the hairline will make it look more natural and even.
We need to make sure the entire hairline is even. Because we're wearing a glueless wig, I need to make the hairline look less dense. After trimming both sides of the hairline, it looks very natural and realistic.
Step 5: Trim And Layer This Wig
We need to trim this hair slightly. Don't cut too much. Take the hair from underneath and just cut it straight. Make sure the ends are trimmed evenly. Then we need to take this section of hair on the side and pull it to the side. Then I'm going to cut it at an angle.
This will help to remove some of the bulkiness. The resulting haircut will have some layers and look like a rounded shape. Next, we need to do the same thing on the other side. And that's how the hair is trimmed. I really like this voluminous effect!
Step 6: Secure This Wig With an Elastic Drawstring
You need to comb your hair back and up. Because this kinky curly wig has a drawstring. I really like the drawstring because I have a small head. You just need to tighten the drawstring. Then tuck the drawstring into your hair. It will be securely fixed to your head. It won't fall off. It feels incredibly secure. This way, we can style our hair with confidence without worrying about it moving around.
Step 7: Define The Curls
Divide your hair into two sections and apply anti-frizz curling mousse. Apply it to the hair around your face first, then to the back and bottom sections, working in small areas. You'll also need a comb to detangle and define the curls, helping them clump together. You can also twirl the curls with your fingers or let them curl naturally. Then apply styling gel to your hair to ensure the curls hold their shape.
Step 8: Create the Natural Hairline And Baby Hairs
First, use a comb to manage the stray hairs, then use tweezers to remove any remaining loose hairs. Use a small brush to smooth and style these stray hairs, resulting in perfectly styled baby hairs. This also makes the hairline look more natural. To make the lace edge of the wig look more natural, you need to use some lace styling gel to help the lace edge adhere to the skin.
Then, simply apply a small amount of lace glue, ensuring it covers all the edges of the lace. Trim the baby hairs and shape the hairline. After about 5 to 10 minutes, the hairline will be completely blended with the skin. The final step: we need to highlight the hairline. Use hair dye powder to create a more defined and natural-looking hairline.
Step 9: Finish Look: Style This Wig
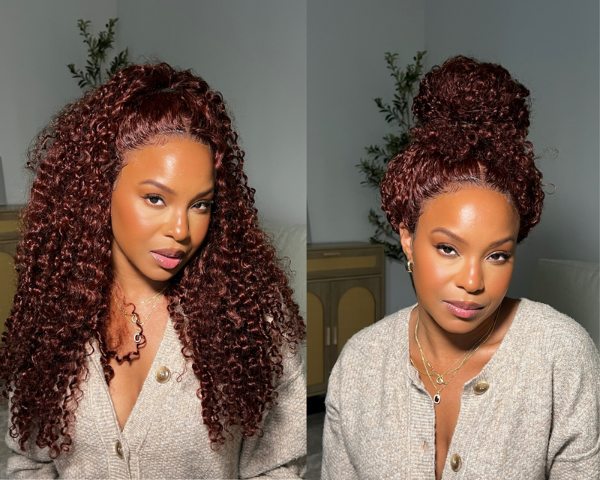
Next, we're going to try a few different hairstyles, starting with my favorite: the half-up half-down. Simply pull out a small section of hair at the hairline and tie it up – that's a simple half-up half-down.
This wig is glueless, so you can fully expose your hairline. You can also try pulling all the hair back and securing it with a satin scrunchie to create a bun.
The Details Of The Reddish Brown Curly Wig
Hair Info: Bye Bye Knots Wig 2.0™ 7x5 Reddish Brown Jerry Curly 24"
3D Cap Design – Glueless Wig, Put on & Go!
√ Pre-Plucked √ Pre-Bleached √ Pre-Cut √ Drawstring