


Wigs come in various densities and weights. When you purchase a new wig, the hair is often quite dense, which can make it look overly heavy or bulky. Manufacturers tend to include extra hair to give customers the flexibility to style it as they prefer, rather than limiting options due to insufficient volume.
However, excessive density can make the top of the wig look puffy or unnatural. Furthermore, a heavy wig doesn't suit everyone; depending on your head shape, facial features, or lifestyle needs, you might want to thin out the wig to achieve a more natural look.

This often leaves first-time wig wearers wondering: how do I thin out a wig to suit my face shape better and achieve that ideal, natural look? Want to know how? Look no further!
In this article, our step-by-step guide will show you how to easily thin out your wig, helping you create your desired style without compromising the wig's quality. Whether you are a beginner or a seasoned wig wearer, this guide has you covered. Say goodbye to styling hassles and hello to a natural, flawless wig look. Let's get started!
Why Should You Thin Out a Wig?
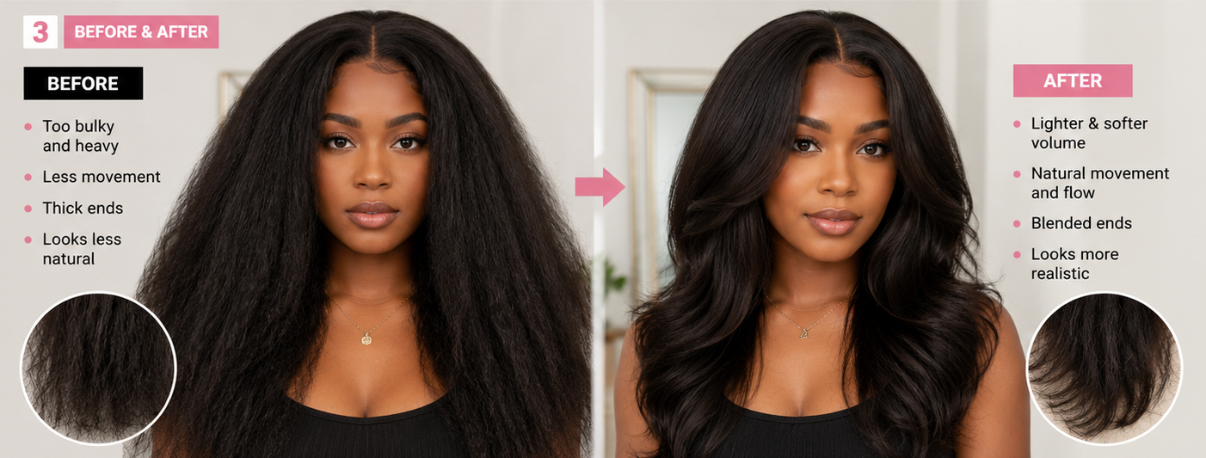
Creating a Natural Look
One of the primary reasons for thinning out a wig is to achieve a more natural appearance and enhance its realism. After all, you want your wig to look and feel just like real hair, right? Wigs that are too thick can appear bulky and unnatural; thinning the hair reduces volume, creating a softer, more realistic silhouette and a style that feels lighter, more breathable, and more natural.
Enhancing Comfort and Breathability
Heavy wigs can cause discomfort, especially in hot weather or during prolonged wear. Thinning the hair makes the wig lighter, which improves airflow. A thinned-out wig feels effortless to wear—without the sensation of heaviness—and offers excellent breathability for all-day comfort.
Increasing Styling Versatility
Another major advantage of thinning a wig is the expanded range of styling options. It is a simple way to add natural volume and layers to the look. When a wig is overly thick, it can be difficult to style it exactly as you wish. Whether you are aiming for beachy waves or a sleek high ponytail, having the right amount of hair makes it easier to manipulate the strands and create your desired style.
Achieving a Custom-Fit Feel
Everyone has a unique head shape and size, so the fit of a wig isn't always perfect right out of the box. Thinning the wig allows for adjustments tailored to your specific needs. By reducing hair density, you can make subtle refinements that significantly improve how the wig sits and conforms to your head.
How Do You Determine If Your Wig Needs Thinning?

While thinning a wig offers many benefits, not every wig requires it. You might want to consider thinning your wig if you notice the following signs:
- The wig feels unusually heavy.
- The ends look stiff and bulky.
- The layering transitions appear unnatural.
- The hair lacks movement and liveliness.
- The crown area looks overly puffy or thick.
- It looks unnatural in photos.
- Friends can easily tell you are wearing a wig.
If your wig has a lower density (around 130%), thinning may not be necessary.
What Do You Need to Thin Out a Wig?
If you decide to thin out your wig, having the right tools is essential for a smoother, easier process. Be sure to avoid using standard scissors, as they can damage the wig fibers or the cap structure. To preserve the quality and comfort of your wig, we recommend gathering the following items for thinning it at home:
Thinning Shears
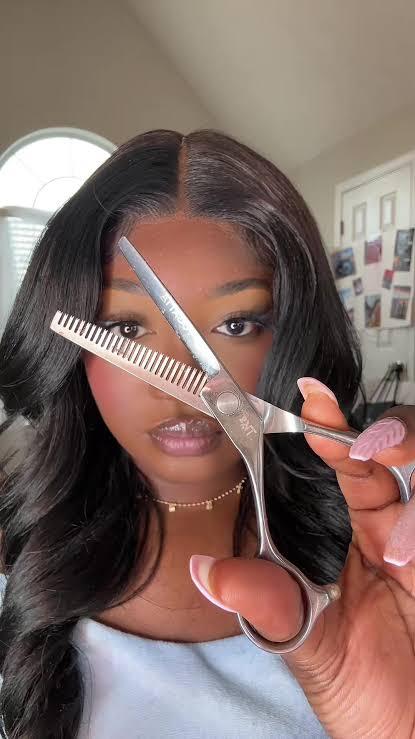
These specialized styling tools feature fine teeth on one blade, allowing you to cut only a portion of the hair at a time. This creates a soft, natural look and avoids the harsh, blunt lines caused by regular scissors. Be sure to choose high-quality shears, as inferior ones can damage the hair strands.
Hair Clips
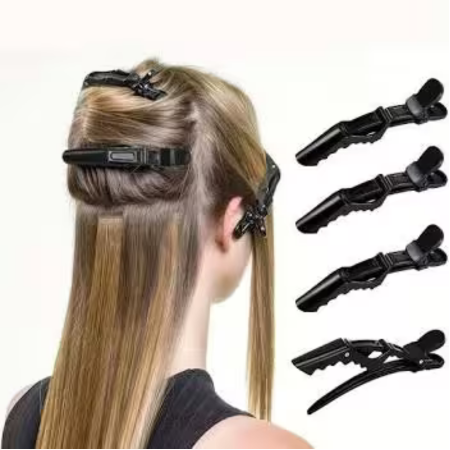
Clips are perfect for sectioning the wig while you work. You can use them to pin back or secure sections you aren't currently trimming, allowing for an organized, section-by-section approach. It is a good idea to have clips of various sizes on hand.
Wig Comb
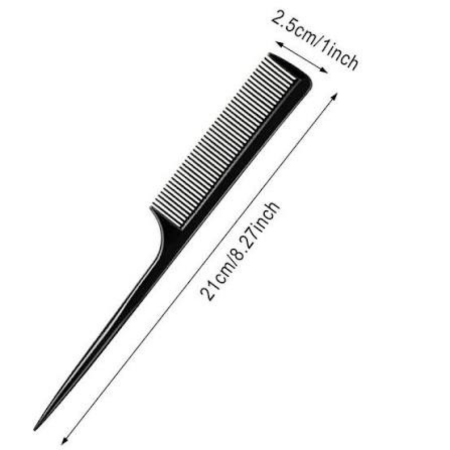
Before you begin thinning, use a small, fine-toothed comb with a pointed tail to section the wig and comb through the hair evenly.
Wig Brush
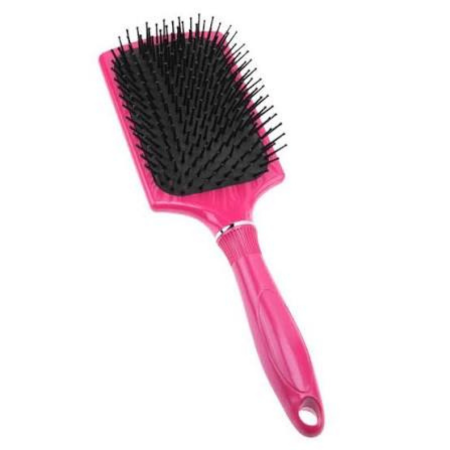
Use a soft-bristled brush to remove loose strands without damaging the wig fibers.
Wig Stand

Placing the wig on a stand gives you a clear view of how it looks when worn, making it easier to style to your liking. To ensure the wig stays securely in place without shifting, you can apply a small amount of setting mousse to the inside of the wig cap.
Once you have all your tools ready, you're all set to begin! Let's move on to the actual thinning process.
How to Thin Out a Wig: Step-by-Step Guide
Once you have your tools ready, try on the wig to visualize the desired look and identify areas where the hair is too thick or needs thinning to suit your styling needs. This will serve as a reference for your trimming process.
Depending on the wig's length and density, thinning it out at home typically takes 30 minutes to an hour, so allow yourself plenty of time and find a comfortable position to work in. Follow the steps below to achieve the perfect result:
Step 1: Secure the Wig to the Stand

Place the wig on the stand and roughly style it into your desired look. This helps you identify the thickest areas of the hair so you can focus on them when thinning. Once ready, use hair clips to secure the wig to the stand, ensuring a firm fit so it doesn't slip while you work.
Step 2: Detangle the Wig
Carefully comb through the wig, starting from the ends, to remove any tangles or clumps. If you encounter stubborn knots, gently separate the strands with your fingers before combing the area smooth. This ensures the wig's true shape is revealed, allowing for precise trimming.
Step 3: Sectioning the Wig
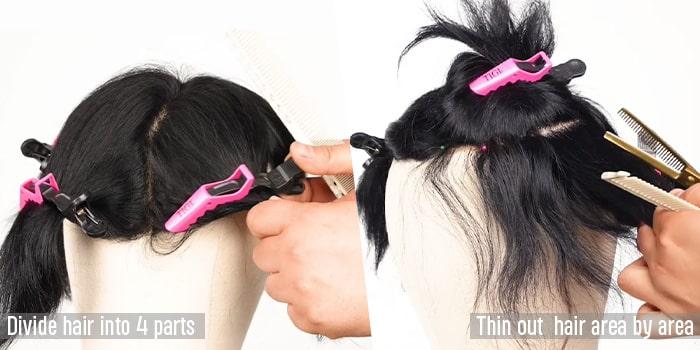
After ensuring the wig is free of tangles, use a wig comb to divide the hair into even sections and secure each section with a hair clip. This allows you to work on one area at a time, ensuring a uniform and consistent trim.
Begin by separating the top layer of the wig; if the hair is very thick, clip this layer up and out of the way. Next, isolate a small strand (approximately 1/4 inch wide) to work on, while clipping back the remaining hair. Work in sections starting from the back and sides, gradually moving toward the front; always begin with small areas and progress upwards.
Step 4: Thinning the Wig
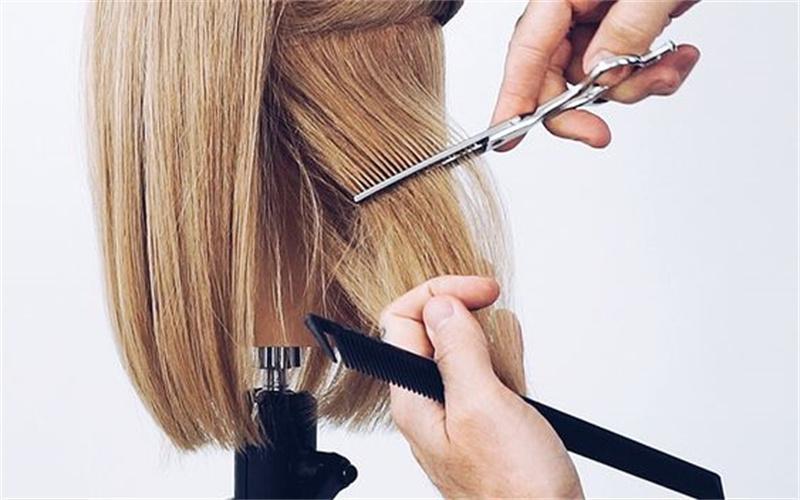
First, unclip the section you wish to thin and hold that bundle of hair with one hand. With your other hand, hold the thinning shears and make the initial cut as close to the roots as possible.
Then, slide the shears along the hair toward the ends while continuing to cut; the number of cuts depends on how much volume you want to remove. To create a more dynamic, layered look, you can leave some hair intact in the mid-section while thinning the roots and the middle lengths.
Please Note:
Want to achieve a natural, layered look for your wig? Be sure to work section by section and layer by layer, strategically removing small amounts of hair to create a natural, effortless appearance.
Precision is key when thinning, so take your time and give your wig the careful attention it deserves. Please handle the thinning shears with care and practice your technique before working on the actual wig!
Step 5: Comb Away Excess Hair
After trimming, use a comb to remove the cut hair. Be sure to clear the accumulated hair from the comb promptly to prevent it from tangling with the hair that still needs to be trimmed.
Step 6: Repeat the Process
Remove the clip from the next section and repeat the previous steps to evenly thin out the hair. Remember to trim at the same position on each strand and take a moment to clear away the trimmed hair before moving on to the next section. With practice, you will refine your thinning technique and consistently achieve perfect results.
Practical Tips and Advice for Successfully Thinning Out a Wig
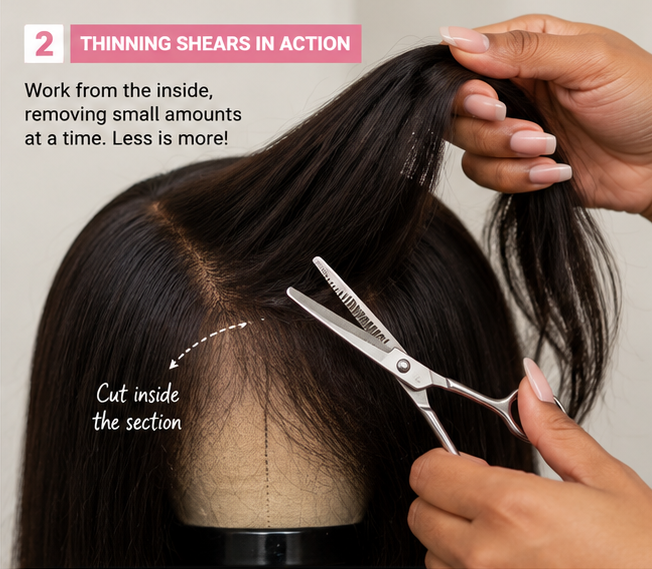
Tip 1: Thin out small amounts at a time. The key to achieving the perfect wig style is a gradual approach. Avoid rushing or making drastic cuts; instead, take your time and work on small sections of hair at a time.
Tip 2: Start cutting from the top and work your way down, following the natural direction of the hair. This technique ensures a smooth, even finish and prevents clumping or uneven thickness.
Tip 3: Some wigs may have harsh, unnatural layers that detract from their overall look. Don't worry—a little trimming can create a natural effect! A few careful snips with thinning shears are all it takes to eliminate unsightly, bulky sections of hair.
Tip 4: Be sure to section the hair evenly and thin it out section by section. You can put the wig on occasionally to gauge how much more trimming is needed. Take your time and pause frequently to check your progress, as hair that has been cut away cannot be put back.
Tip 5: Use a layered cutting technique: trim the longer top layers first, followed by the shorter bottom layers. This not only reduces bulk but also enhances the wig's natural texture and appearance.
Tip 6: If you are unsure or lack confidence in trimming the hair yourself, consider seeking professional help. Professionals can use their expertise to style the wig according to your personal preferences and comfort needs.
FAQs About Thinning Out A WigHow Often Should You Thin Out a Wig?
Wigs do not require regular thinning. Typically, a single trim is sufficient if the hair feels too thick when first worn; subsequent trimming is only necessary if the wig begins to look overly bulky or loses its natural shape. Excessive thinning can shorten the wig's lifespan, so always trim sparingly.
What is the Safest Tool For a Beginner To Use When Thinning Out a Wig at Home?
Thinning shears. They allow you to gradually reduce hair volume without leaving harsh cut lines. Unless you have prior experience, you should avoid using a hair-thinning razor, as it can remove too much hair very quickly.
How Much Should a Wig be Thinned Out?
It depends on personal preference. It is recommended to start by reducing the hair volume by 10% to 15%, focusing on areas where the hair appears thickest or heaviest, such as the crown and the sides. Work in small sections, combing through and checking the results after each cut before deciding whether to thin it out further. Be sure to proceed gradually until you achieve the desired volume.
Will Thinning Damage the Wig?
It won't cause damage if done correctly. Using thinning shears and trimming small amounts at a time helps maintain the wig's structure and natural appearance.
Can Synthetic Wigs be Thinned Using the Same Methods as Human Hair Wigs?
Yes, but proceed with caution. Synthetic wigs may react differently to cutting or thinning than human hair, so it is advisable to test a small area first.
Will Thinning a Wig Shorten Its Lifespan?
Not if done correctly. Excessive thinning or cutting too close to the wefts or the wig cap base can lead to hair loss. Using the right tools and proper techniques helps maintain the wig's integrity.
Can a Lace Front Wig be Thinned Without Damaging the Lace?
Yes. Separate the hair from the lace area and thin only the mid-lengths to the ends. Ensure that all cutting tools remain at least 1 to 2 inches (approximately 2.5 to 5 cm) away from the lace.
Conclusion
By now, you have likely fully mastered the methods and techniques for thinning out a wig. Thinning a wig isn't just about aesthetics; it’s also about comfort, style, and meeting your personal preferences.
Whether you are aiming for a more natural look, enhanced comfort, versatile styling options, or a custom-like fit, thinning the hair can make a significant difference. So, if your wig feels too heavy or bulky, why not trim it? It's the perfect way to achieve a wig that is both beautiful and comfortable—give it a try today!