
When it comes to choosing a beginner-friendly wig that still looks sleek, natural, and effortlessly stylish, finding the right one can be a challenge. That’s why beauty influencer Kie Rashon’s review of Nadula’s Upgraded Beginner-friendly Pre-Cut Yaki Bob Wig caught everyone’s attention.
Known for her honest and relatable hair reviews. In this article, we will see what YouTube influencer channel Kie Rashon has to full review about this no-glue bleached knots natural yaki bob chestnut brown wig from unboxing to styling and how to install it. To see if this pre-cut Yaki bob really delivers on its promise of effortless beauty.
Kie Rashon Full Review About The Chestnut Brown Yaki Bob Wig
Crazy For the Price Point (Under $100)
This wig brought the looks and the savings and it is from Nadula hair. It is under $100. About $95 to be exact. Okay, with Kie’s coupon code, they give you a coupon on
Kie's 12 Inch Wig Without a Drawstring
This is a 7x5-inch Bye-Bye Knots 3.0 wig. It comes pre-cut, plucked, bleached, and dyed. It also comes with a drawstring. If you're getting a regular 10 to 14 inch wig, there's no drawstring or side combs, just a back comb, adjustable straps, and a removable elastic band so you can adjust it to your preference. If you're getting a 16 to 25 inch wig, in addition to these, you also get a drawstring. Kie's wig doesn't come with a drawstring because it's a 12-inch wig.
Out of the Box and Ready to Wear
Right from the start, Kie Rashon expressed her appreciation for how convenient and beginner-friendly the wig appeared. In her unboxing, she highlighted Nadula’s thoughtful packaging — clean, secure, and professional. The wig arrived pre-cut and pre-plucked, with the lace already customized, meaning there was no need for scissors, glue, or advanced styling tools.
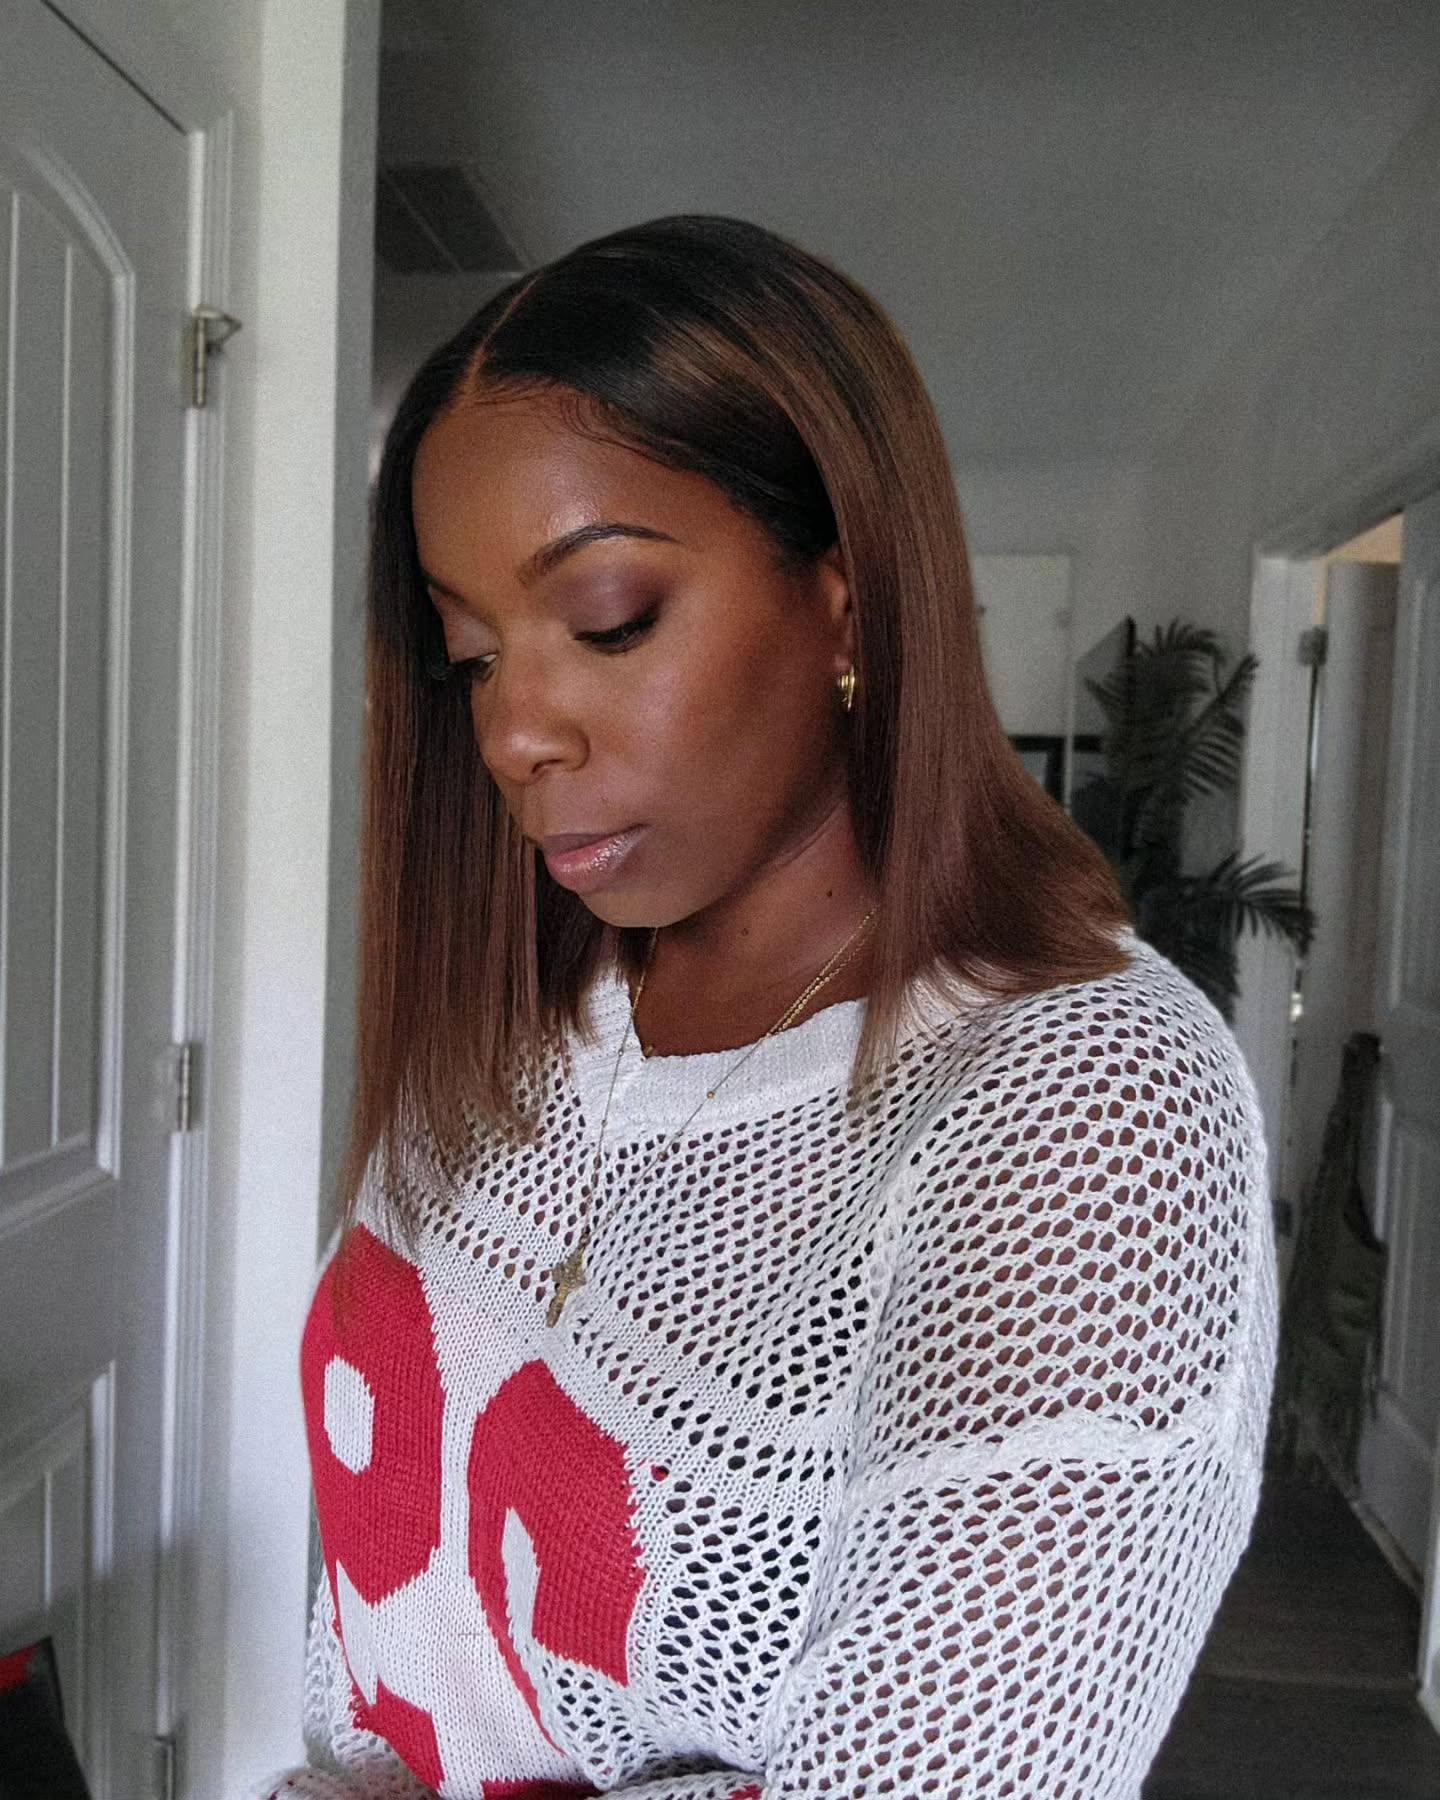
Kie loved how the Yaki texture immediately stood out. Unlike silky-straight wigs that can look too shiny or synthetic, the Yaki finish mimics relaxed or blown-out natural hair, giving it that realistic body and movement she always looks for. Her first impression was simple: “This looks like my own hair — just way more polished.”
Cap Construction and Comfort
As she examined the inside of the cap, Kie pointed out the adjustable straps and combs that make it secure yet comfortable to wear. She emphasized that for a beginner, a snug but breathable fit is key, and this yaki straight wig offered just that.
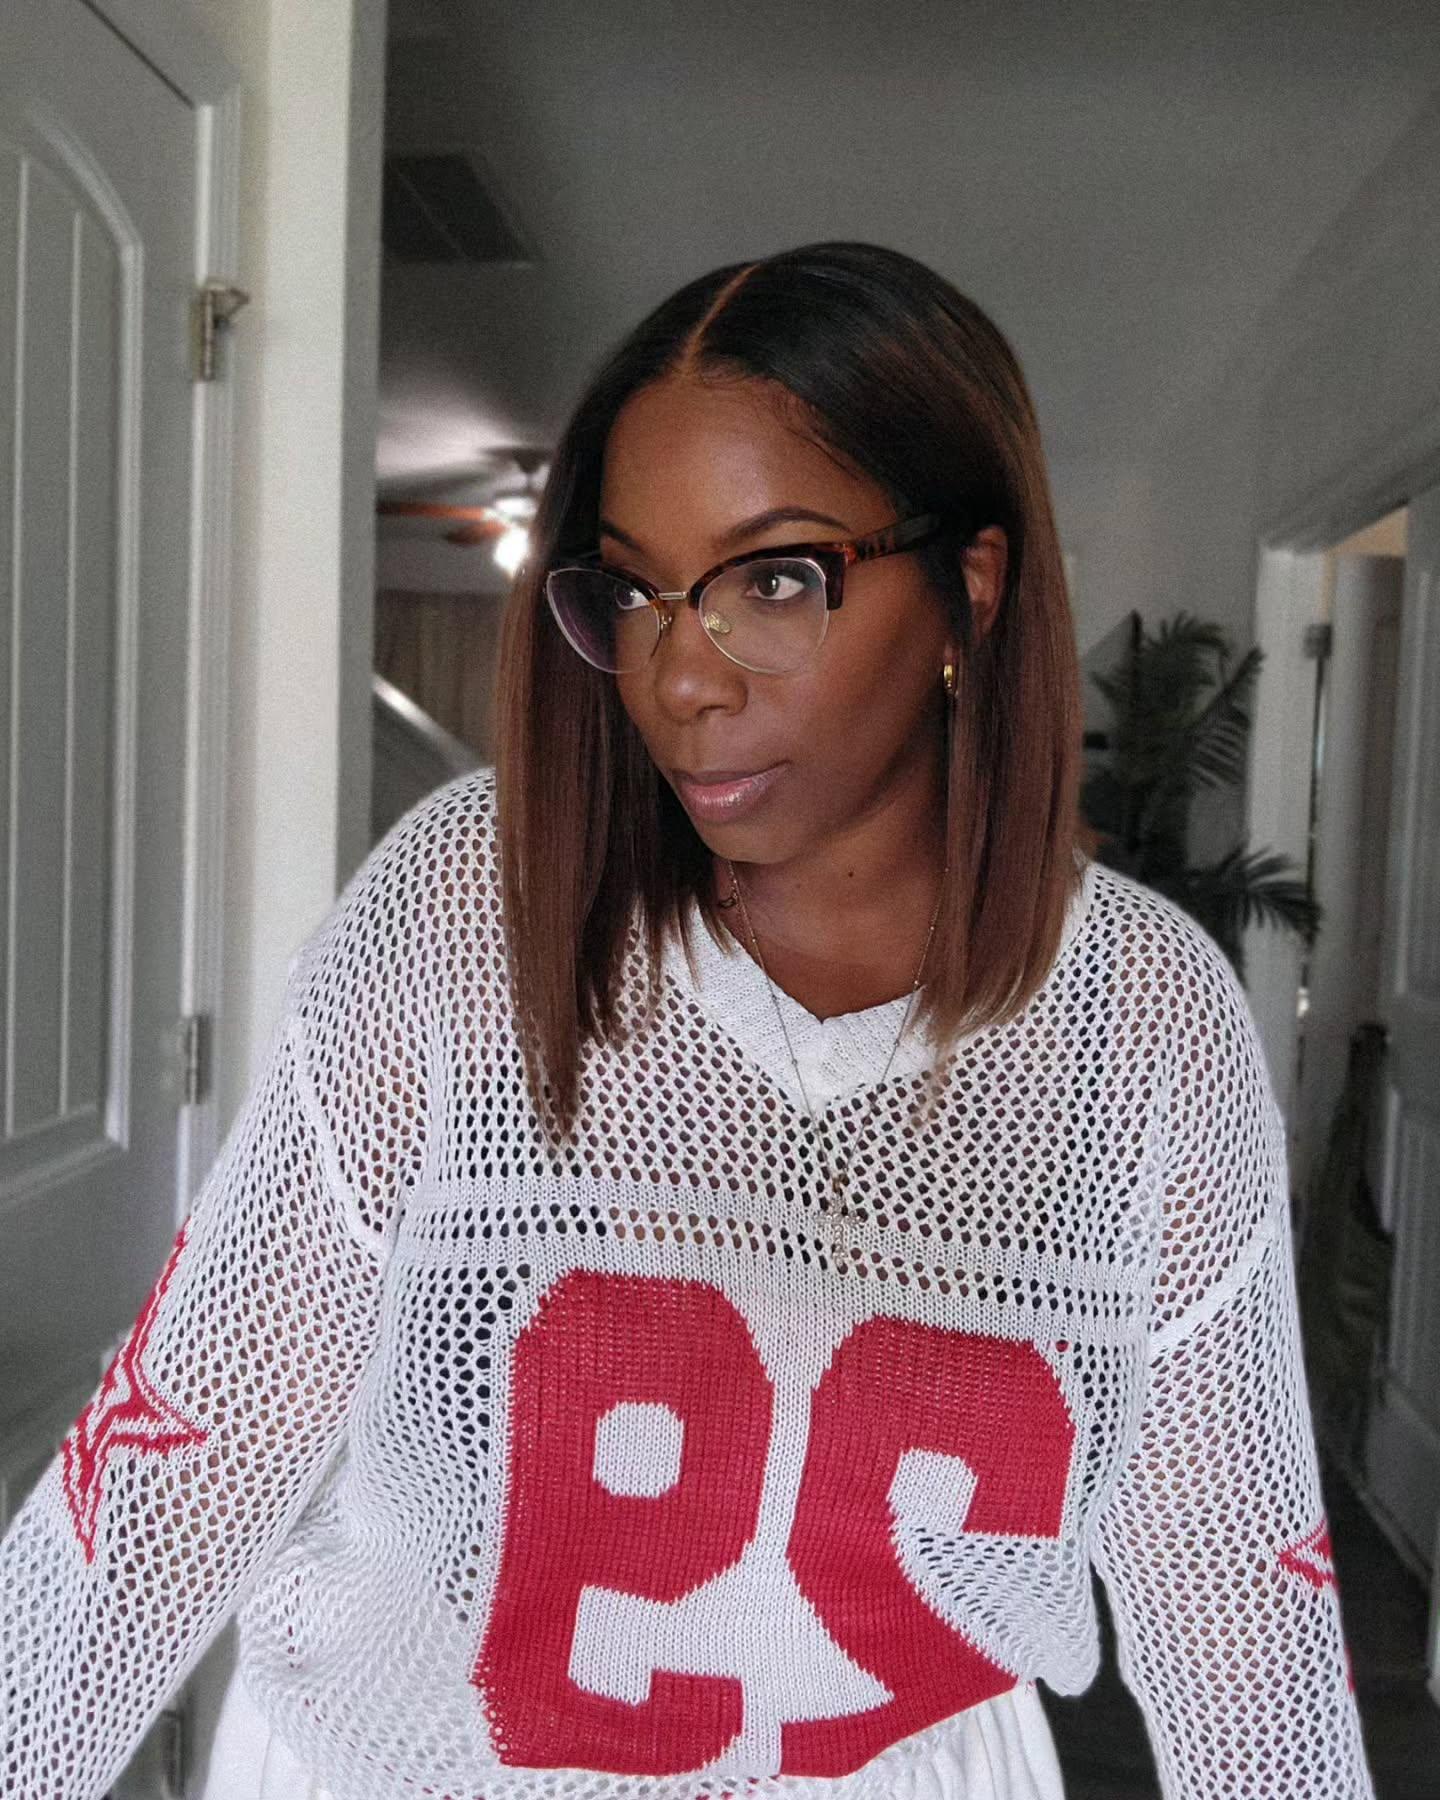
One of the standout upgrades, according to Kie, was the pre-cut lace design. The lace seamlessly blended into her skin tone with minimal effort. No glue, no gel — just put it on, adjust the straps, and go. For those who dislike the hassle of melting lace or baby hairs every morning, Kie’s reaction said it all: “You literally don’t have to do much. It’s beginner-ready for real.”
Styling and Everyday Use
Once she installed the wig, Kie began testing its versatility. She straightened the bob slightly with a flat iron, and the wig handled the heat perfectly — smooth, soft, and without any signs of frizz or damage. She also tested movement by brushing through and flipping the hair to see if it stayed natural-looking.
What impressed her most was the texture retention. Even after styling, the Yaki pattern remained intact, keeping that soft, blown-out look without reverting or losing shape. Kie styled it in a classic middle part and noted that the hairline required almost no work — no visible demarcation, no extra plucking.
Throughout the video, she emphasized that the wig doesn’t shed excessively and tangles minimally, which is especially important for shorter wigs meant for daily wear.
Detailed Installation Steps By Kie Rashon
Step 1: After receiving your wig, be sure to wash it, as it has a slight chemical smell. If you prefer, you can spray it with wig perfume.
Step 2: Before I put the wig on, I needed to dye the lace at the front. I used Black Radiant Saw Focus powder in a milk chocolate color. I applied it to my wig brush and then used it to apply it to the wig. Then, I looped the headband around the edge of the lace. This wig was attached without glue.
Step 3: After completing these preparations, I put the wig on my head. There are indeed cutout earpieces on the sides. The new earpieces curve above the ears and then angle back, which is perfect for wearing glasses and makes them feel comfortable behind my ears.
Step 4: Remove the headband from the lace edge and blend the thick line with a dark to medium tone from my contouring palette. Brush off any excess. Then, apply mousse around the hairline.
Step 5: Use a side brush to brush down some baby hairs and trim them shorter. Apply more mousse to your hairline. Then, slightly curl the baby hairs into swirls. Wrap them around the hair with a headband.
Step 6: Use a hot comb to straighten your hair quickly. Comb out any bumps. Apply Sleek and Shine Shine Serum to your hair, leaving it soft and flowing.
Step 7: Once the hair is straight, spray it with hairspray, remove the headband, and blend the line across my forehead. Make sure the hairline is correct. Sprinkle some milk chocolate powder on the parting and curl the ends with a curling iron. The wig is now attached and styled perfectly.
The Product Details
Hair info: 7x5 Glueless Lace Black to Chestnut Brown Yaki Bob Wig 12inch|A Wig UNDER $100